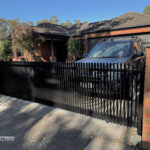
Thinking about installing a Colorbond fence and gate around your property? You’re not alone. With its clean lines, weather-resistant finish, and wide colour range, Colorbond is one of the most popular fencing options in Australia — and for good reason.
But before you pick up a shovel or call in the tradies, there’s a key decision to make: Should you DIY the installation or hire a professional?
This guide will walk you through both options in detail. We’ll break down costs, pros and cons, step-by-step installation, and some important things to consider so you can make the best decision for your home and lifestyle.
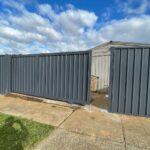
What Is a Colorbond Fence and Why Choose It?
Colorbond is a pre-painted steel material made by BlueScope, known for its strength, weather resistance, and stylish colour range. Colorbond fencing panels are designed to interlock neatly and come in a variety of heights and colors, making them versatile for both residential and commercial properties.
Why so many homeowners love it:
-
Super durable – Built to handle sun, wind, and rain
-
No maintenance headaches – Forget about rotting wood or termite issues
-
Great for privacy – No gaps for nosy neighbours
-
Stylish options – Comes in a range of modern colours
-
Long-lasting – You’ll get 20+ years with proper care
So now that we know why Colorbond is a winner, let’s get into the nitty-gritty: should you install it yourself, or bring in a pro?
Is DIY Colorbond Fence Installation a Good Idea?
Doing it yourself can definitely be tempting. You save on labor costs, get full control over the project, and there’s a sense of pride that comes with building something with your own two hands.
But it’s not all smooth sailing. Here’s a look at both sides of the coin.
DIY Pros:
-
Saves money – No need to pay a contractor
-
Work on your own schedule – Great for weekend warriors
-
Personal satisfaction – There’s nothing like stepping back and saying, “I built that”
DIY Cons:
-
Takes time and effort – It’s hard work, especially if you’re doing it alone
-
Needs tools and know-how – A few rookie mistakes can throw things off
-
No warranty – If something goes wrong later, it’s on you
If you’re up for the challenge, though, and have the right tools, Colorbond fencing can be a rewarding DIY project.
What You’ll Need for DIY Colorbond Fence Installation
Before you start digging, make sure you’ve got everything lined up. You don’t want to be halfway through and realize you’re missing something crucial.
Materials:
-
Colorbond fence panels
-
Fence posts (with caps)
-
Rails and plinths (if using)
-
Concrete mix for posts
-
Screws or rivets (depending on your kit)
-
Gate kit (includes posts, hinges, latch, etc.)
Tools:
-
Shovel or post hole digger
-
String line and stakes
-
Tape measure
-
Level
-
Spirit level
-
Drill with metal drill bits
-
Tin snips or angle grinder
-
Safety gear (gloves, goggles, boots)
Step-by-Step: How to Install a Colorbond Fence and Gate System
Step 1: Plan and Measure

Start by checking local fencing rules with your council. Make sure you’re not going over height limits or building on someone else’s land (trust us, your neighbours won’t appreciate it).
Measure your boundary line and mark where each post will go — most Colorbond panels are designed to fit between posts spaced 2.4 metres apart.
Step 2: Dig the Holes

You’ll need to dig holes around 600–800mm deep for your posts. This part is a bit of a workout, so pace yourself.
Tip: Use a string line across the top of the posts to keep everything straight and even.
Step 3: Set the Posts

Mix your concrete, plonk the posts in the holes, and check they’re level as the concrete sets. Make sure they’re perfectly upright — crooked posts can cause alignment issues with the panels later on.
Let the concrete cure for at least 24 hours before moving on.
Step 4: Assemble and Fit Panels

Once the posts are secure, start slotting in the panels. Begin with the bottom rail, slide in the Colorbond sheets, then fit the top rail. Secure the rails to the posts using self-drilling screws or rivets.
Work your way down the fence line, checking that everything stays level and tight as you go.
Step 5: Install the Gate

Installing the gate is similar — you’ll just need to pay attention to spacing and alignment. Use the supplied gate posts, hinges, and latch. Make sure the gate swings freely and doesn’t drag.
If your gate is wider or automated, it might be worth getting a little help from a pro at this stage.
Read more: Why Northern Melbourne Homeowners Choose Colourbond Automatic Sliding Gates
Thinking About Hiring a Professional Installer
Why go with a professional:
-
They know the ropes – No guesswork, just solid workmanship
-
Faster install – Professionals can usually finish in 1–3 days
-
No tools required – They bring everything
-
Peace of mind – Many offer warranties on both materials and labour
-
Compliant and up to code – No nasty surprises from the council
Of course, it’ll cost more upfront, but for many homeowners, the time and hassle saved is well worth the price.
Cons of Hiring a Professional:
-
Higher upfront cost – Labor costs typically range between $75–$120 per meter
-
Scheduling – You’ll need to work around the contractor’s availability
Read more: How to Get the Best Quote for a Colorbond Fence Installation
Looking for Colorbond Fence & Gate Installation in Melbourne? We’ve Got You Covered.

If you’re leaning toward hiring a professional, and you’re based in Melbourne, you’re in luck.
At Pentagon Fencing & Gates, we specialise in Colorbond fencing and gate installation — and we’ve helped hundreds of homeowners and businesses across Melbourne create secure, stylish boundaries that last for decades. Whether it’s a sleek privacy fence, a matching gate system, or a full perimeter upgrade, our team has the tools, skills, and local experience to deliver results you’ll be proud of.
Why choose Pentagon for your Colorbond installation?
-
Professional, reliable workmanship from experienced fencing specialists
-
High-quality Colorbond materials in a wide range of colours and styles
-
Custom fence and gate solutions to suit your layout and needs
-
Seamless project management from start to finish
-
Servicing residential, commercial, and industrial properties across Melbourne
We take care of everything — from measuring and quoting to final cleanup. And the best part? Our fences don’t just look great on day one — they’re built to stand the test of time.
Ready to get started?
Visit our Colorbond fencing installation page to learn more about our process, see past projects, and request a free quote.
Cost Comparison: DIY vs Professional Installation
| Component | DIY | Professional |
|---|---|---|
| Materials (per meter) | $85–$110 | Included |
| Tools | $200–$500 (initial outlay) | Included |
| Labor | Free (your time) | $75–$120 per meter |
| Time | 2–5 days (weekend project) | 1–3 days |
Pro Tip: Some professional installers offer partial services — such as setting posts — to help DIYers save while avoiding the hardest parts of the job.
Read more: How Much Does Colorbond Fencing Cost in Australia?
Key Considerations Before Choosing DIY or Pro
1. Property Terrain
If your property is sloped or uneven, installation becomes more complex. Cutting sheets to fit gradients and adjusting posts requires skill and can make DIY challenging.
2. Time Availability
DIY can be spread over multiple weekends. If you’re time-poor or want fast results, hiring a professional is more practical.
3. Permits and Boundaries
Ensure you’re not building on your neighbor’s property. A contractor can help navigate permits, boundary disputes, and legal requirements.
4. Gate Complexity
Basic single gates are manageable DIY jobs. Double gates, automation systems, or sloped gates may require professional expertise.
Tips for a Successful DIY Fence Project
-
Order extra panels in case of mistakes or damage
-
Wear protective gear when cutting or handling steel
-
Use anti-corrosion screws to match Colorbond materials
-
Install plinths or sleepers to prevent soil buildup against panels
-
Paint cut edges with Colorbond-compatible paint to prevent rust
Maintenance and Longevity of Your Colorbond Fence

One of the biggest advantages of Colorbond fencing is its minimal upkeep. To keep it looking fresh and ensure long life, follow these tips:
-
Hose down panels periodically to remove dirt and debris
-
Keep the base clear of soil, mulch, and leaves
-
Inspect for damage after storms or high winds
-
Lubricate gate hinges annually
-
Touch up scratches with Colorbond paint to prevent corrosion
When properly installed and maintained, a Colorbond fence can last 20+ years, making it a long-term investment in your property’s security and appearance.
Read more: 15 Tips For Colorbond Fence Maintenance and Repair
Final Verdict: DIY or Hire a Pro?
Both options have their place depending on your budget, skill level, and time availability.
Choose DIY if:
-
You have basic construction experience
-
The terrain is flat and uncomplicated
-
You’re motivated and have the necessary tools
-
You’re comfortable with a few weekends of work
Choose a Professional if:
-
Your time is limited
-
You want a polished finish and guaranteed quality
-
Your site has slopes or complex needs
-
You’re installing custom gates or automation features
Conclusion
Installing a Colorbond fence and gate system is a smart move for any property owner seeking durability, privacy, and modern aesthetics. While a DIY installation is achievable for those with time and basic skills, a professional installation ensures long-lasting, hassle-free results.
Before you decide, weigh the cost, effort, complexity, and finish quality you expect. Whichever path you choose, a properly installed Colorbond fence will serve your home for decades to come.
Frequently Asked Questions (FAQs)
Q1: How long does it take to install a Colorbond fence?
DIY installation typically takes 2–5 days. A professional can complete it in 1–3 days.
Q2: Do I need council approval for a Colorbond fence?
It depends on your location. Most councils allow fences up to 1.8 meters without permits, but always check local regulations.
Q3: Can I install a Colorbond gate by myself?
Yes, especially if it’s a standard pedestrian gate. More complex gates may require help.
Q4: Will my Colorbond fence rust?
Colorbond is made with corrosion-resistant steel, but scratches and exposed edges should be treated to prevent rust.
Q5: What’s the best way to clean a Colorbond fence?
Use a garden hose or soft cloth with mild soap. Avoid abrasive materials.